Place letters along a straight, curved or wavy line. Use the handles to adjust the position of the letters and the shape of the line.
-
You cannot resize these lettering shapes with the handles.
Note: Control–click to open the Letter Properties dialog to resize the lettering. See Changing Letter Properties. -
Flip handles are not available. You can mirror after fixing the lettering as stitches.
-
These lettering shapes can only use one line of text, or two for Full Circle. Additional lines are combined with the first line, or the second line for Full Circle.
Circle Shapes
Place characters along a curved line. Circle lettering shapes always use Center alignment.
-
Rotate handles are not available for the Circle lettering shapes. To rotate, fix the lettering as stitches first.
Use Circle Clockwise
 to place lettering clockwise around a circle.
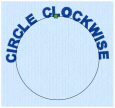
Drag the square green handle to adjust the radius of the circle and the position of the lettering. Multiple lines of text are placed in the same line. Hold down Shift, then drag the handle to move the lettering around the circle without changing the size of the circle.
Use Circle Counter-Clockwise
 to place lettering counter-clockwise around a circle.
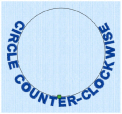
Drag the square green handle to adjust the radius of the circle and the position of the lettering. Multiple lines of text are placed in the same line. Hold down Shift, then drag the handle to move the lettering around the circle without changing the size of the circle.
Use Full Circle
 to place two sections of text on opposite sides of a circle.
When entering characters in the Letters text box, enter Option–Return to make a new line where you want to split the text. When the lettering is initially placed, the text on the first line is at the top of the circle and the text on the second line is at the bottom of the circle.
If more than two lines of text are entered, Full Circle places all extra lines in the second line.
There are two square green handles. Drag either handle to adjust the radius of the circle. Hold down Shift, then drag either handle to move the attached lettering around the circle without changing the size of the circle.
Using Circular Lettering Shapes
The handles for circular lettering shapes adjust the positioning of the lettering, not the size.
-
Enter a short line of text in the Lettering window. See Create Lettering.
-
In the Lettering Shape area, click Circle Clockwise.
-
Click Apply. The lettering appears in a line over the top of a circle.
-
Drag the square green handle at the top of the circle of lettering downwards. The pointer changes to the circle size pointer

.
The circle becomes smaller, but the size of the letters is unaffected. -
Undo your change. The circle returns to its original size.

-
Hold down the Shift key and drag the square green handle at the top of the circle to the right of the circle. The line of lettering moves to the right side of the circle.
Note: You cannot resize circular lettering shapes with the handles. Use the Size and/or the height and width settings in Letter Properties. See Changing Letter Properties.
Rotate and flip handles are not available. To rotate or mirror, use ColorSort to fix the lettering as embroidery first.
The alignment setting does not affect circular lettering shapes.
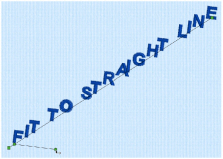
Fit to Straight and Wavy Lines
Use these line types to place lettering along a straight or wavy line.
Step: When the Step checkbox is selected, the letters can be rotated to any angle. Step is available for Fit to Straight Line and Fit to Wavy Line. See Fit Lettering to a Line.


Fit Lettering to a Line
-
Enter a short line of text in the Lettering window. See Create Lettering.
-
In the Lettering Shape area, click Fit to Straight Line.
-
Click Apply. The lettering appears along a sloping line.
-
Drag the square green handle on the right upwards. The angle on the line changes, but the size of the lettering, and the space between the letters does not.
-
Undo your change.
-
Drag the circular control along the line and to the right. The first letter of the lettering moves to the position of the circular control.
-
Delete the lettering.
-
In the Lettering window, select the checkbox labeled "Step".
-
Click Apply. There is now a green circular control at the end of a line below the lettering.
-
Drag the green control downwards. The letters in the line rotate.
-
Delete the lettering.
-
In the Lettering Shape area, click Fit to Wavy Line.
-
Click Apply. The lettering is now on a wavy line with four square green handles, and two green circular controls.
-
Adjust the controls to change the position of the letters.