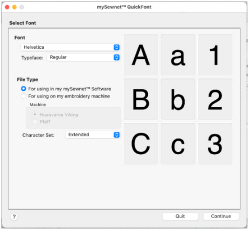
Select Font
-
Start QuickFont
 . The Select Font page appears.
 -
In the Font pop-up menu, choose the desired font name. The previews to the right of the window change with the font choice.
-
In the Typeface pop-up menu, choose the desired style, for example Regular, Light, Bold or Oblique. The options will vary according to the selected font. The previews to the right of the window will change according to the style choice.
-
Select a File Type. Choose between:
A font to use in the mySewnet™ Embroidery Software
A font to use on your embroidery machine. -
In the Character Set pop-up menu, choose the desired set.
The choice of character set will vary, depending on the File Type chosen above. -
Click Continue. The Set Stitch Options page appears.
-
In the Stitch Type pop-up menu, choose the desired Stitch Type. The Output Size may change according to the selected Stitch Type.
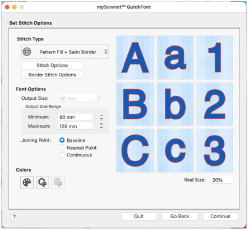
The previews to the right of the window will change according to the selected Stitch Type. For a mySewnet™ Embroidery Software font, the preview is in the middle of the range.
The first three uppercase characters, lowercase characters and numbers are previewed. The size for the 'A' and 'a' characters are set half way between the Minimum and Maximum output size for a mySewnet™ Embroidery Software font, or the characters are set as near as possible to the Output Size for a machine font.
The Real Size % box shows the size of the previews, compared to the Real Size setting in mySewnet™ Configure. -
If desired, click Stitch Options and/or Border Stitch Options and change the settings for the selected Stitch Type, such as the fill pattern or satin border width.
-
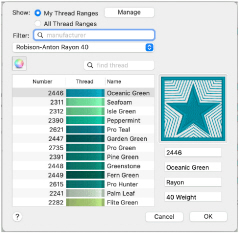
To change the thread color used for satin columns or pattern fill areas, click the Fill Thread Color button
 . The Color Selection dialog appears for you to choose a new color.
 -
To change the thread color used for satin borders, appliqué borders and outlines, click the Border Thread Color button
 . The Color Selection dialog appears for you to choose a new color.
 -
To change the color used for appliqué fabric, click the Appliqué Color button
 . The Appliqué Selection dialog appears for you to choose a new color.
 -
If desired, adjust the Output Size (for a machine font), or Output Size Range (for a mySewnet™ Embroidery Software font).
-
In Joining Point, select Baseline to join letters at the bottom, select Nearest Point to join letters at the place where they are closest for fast stitchout of a small font, and use Continuous for a flowing handwriting effect with a script font.
Note: Joining Point options are only available with a mySewnet™ Embroidery Software font. -
Click Continue. A generating preview message appears, saying that the font is being created. The Output Options page then appears.
-
The Font Name is automatically generated to show the TrueType® font name, then the style name (for example, Regular), then the Stitch Type (S for Satin, F for Fill, FSB for Fill + Satin Border, SB for Satin Border, A for Appliqué or O for Outline), then the character set (E for Extended, SE for Super Extended and so on). At the end is the minimum and maximum recommended sizes in millimeters (for a mySewnet™ Embroidery Software font), or the Output size (for a machine font). If desired, click in the Font Name box to change the name.
-
The mySewnet Font Category is initially set according to your choice of Joining Point. It is set to My Fonts for Baseline joining, Nearest Point for Nearest Point joining or Script for Continuous joining. If desired, choose a different category from the pop-up menu.
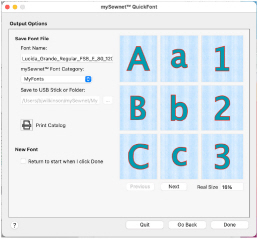
Note: mySewnet Font Category is not available when creating a machine font. -
Machine fonts are saved to mySewnet/My Designs by default. If desired, you can choose a different folder, or save to a USB stick. Click the button with the ellipsis (three dots) to choose a new folder or drive.
-
To view the complete font, use the Previous and Next buttons below the preview to step through the character set.
-
To print a reference sheet showing the characters in the font, click Print Catalog.
-
To start a new font after creating the current one, select the "Return to start when I click Done" checkbox.
-
Click Done and QuickFont will close. The font is saved according to the selected options.
Note: The initial settings in QuickFont are remembered from the last time it was used.
Set Stitch Options
Note: After you have chosen a new thread color, the previews are shown with the new color.