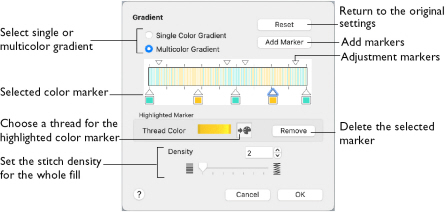
Use Multicolor Gradient to change the color across a fill with only one density. Set colors for the start and end markers for the fill, and the color gradually changes between the two values. Add extra markers for further color changes. Any combination of colors is possible across a fill area.
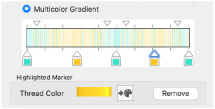
Use the markers above the gradient bar to change the color gradient across the fill.
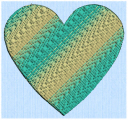
Change the color on a fill area over a range, or use multiple color changes across a fill, to create gradual color changes for a sunset, or subtle shadow effects.
Note: Embroidery on thick fabrics usually looks better with more stitch coverage (a low density setting). Choose a low value such as 2 or 3 for heavy knit fabrics, and a higher value such as 5 or 6 for a light material such as linen or satin.
Reset
Return to the initial settings.
Add Marker
Add Marker places an new color marker below the gradient bar, and an extra adjustment marker above the gradient bar. The initial color for the marker is the same as the currently highlighted marker.
-
Click Add Marker to add new markers, then change the colors and move the color and adjustment markers as desired.
Thread Color
Use Thread Color to change the color of the highlighted marker.
-
Click Thread Color to open the Color Selection dialog.
Remove
-
Click Remove to delete the highlighted marker.
Create a Multicolor Gradient Fill
-
Open an embroidery.
-
Select the Object
 window of the Control Panel
  . The pointer changes to the Object Select
  pointer.
 -
Click to select a pattern fill area in the embroidery.
-
In Edit Properties, click the Properties button. The Pattern Fill properties dialog appears.
-
In the Density section, select Gradient.
-
Click the ellipsis (3 dots) button to open the Gradient dialog.
-
Select Multicolor Gradient.
-
Click a color marker (the marker below the gradient bar) and click Thread Color
 to open the Color Selection dialog.
 -
Change the color to the required color and click OK.
-
Move the adjustment marker above the gradient bar to vary the change in color across the fill.
-
Click Add Marker to add another color marker and adjustment marker.
-
Change the color of the fill as desired.
-
Click OK twice to close the Gradient dialog and the Pattern Fill dialog, and view your changes in the work area.
Note: Check the Edit Properties area to ensure that a pattern fill area ![]() is selected.
is selected.