The stitch type for the currently selected object is shown in the Edit Properties area.
Note: If more than one object is selected, further stitch types can be seen in the stitch type pop-up menu.
Properties
To change the properties for the selected stitch type, click the Properties button, or select Properties from the context menu. The Properties dialog for the stitch type appears.
Lighter Density
Use Lighter Density ![]() to make the stitches in the currently selected object(s) more open. When clicked, the density value is increased by 1.
to make the stitches in the currently selected object(s) more open. When clicked, the density value is increased by 1.
To decrease the stitch density
-
Select an object in the Object window. Click Lighter Density
 to make the stitching in the selected object more open.
 -
Choose Object > Lighter Density.
Heavier Density
Use Heavier Density ![]() to make the stitches in the currently selected object(s) more closed. When clicked, the density value decreases by 1.
to make the stitches in the currently selected object(s) more closed. When clicked, the density value decreases by 1.
To decrease the stitch density
-
Select an object in the Object window. Click Heavier Density
 to make the stitching in the selected object more closed.
 -
Choose Object > Heavier Density.
Convert
Use the Convert function to change the currently selected object to another stitch type.
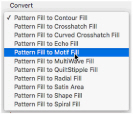
Select the object that you want to convert, then select a new stitch type from the pop-up menu.
Note: If more than one object is selected, there may be more than one stitch type to convert from.
Convert an object
-
Click the Convert button and the stitch type properties dialog appears. Select the desired properties and click OK to change the stitch type.
See Change Bumblebee Wings to Contour Fill. -
Alternatively, Control–click and select the new stitch type from the context menu.