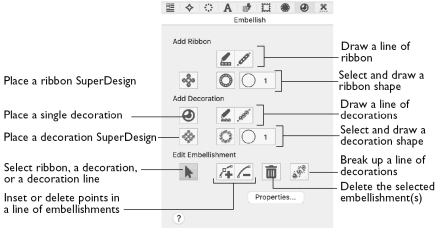
To Open the Embellish Window
-
Click Control Panel
 , then click Embellish
  .
.
|
To learn how to |
Go to |
|---|---|
|
Select decorations or ribbon |
|
|
Add ribbon to a design |
|
|
Draw a ribbon shape |
|
|
Add a ribbon SuperDesign |
|
|
Add single beads to a design |
|
|
Draw lines of decorations |
|
|
Draw decoration shapes |
|
|
Add a Decoration SuperDesign |
|
|
Select and change decorations |
|
|
Add a decorations to an embroidery |
See Sequin Snow and Decorated Bells |
|
Create and adjust a bead shape |
|
|
Change a Decoration SuperDesign |
Center or Line Placement: Center or Line placement stitches are created automatically for decorations according to the options set in mySewnet™ Configure, which may be altered when you export the embroidery.
Note: Alternatively, create a crystal transfer template (rhinestone template) for automated cutters for pressing hotfix crystals and nailheads directly on your work, using File > Export Decoration Template. See Export Decoration Template.
Center placement stitches are recommended when most decorations are individual and symmetrical. Line placement stitches are recommended when most decorations are individual and asymmetrical (such as bugle beads) or lines of closely spaced beads or sequins.
Note: Decorations are placed on top of the background, appliqué and embroidery.