Use Free Motion ![]() to blend multiple thread shades in the same area, to create thread paintings from your pictures. Also, overlap areas of different colors to make a gradual transition from one color to another. Color choice has a huge impact on the finished design. For example, mix metallic thread over a darker rayon color to give depth beneath the shimmer of the metallic thread.
to blend multiple thread shades in the same area, to create thread paintings from your pictures. Also, overlap areas of different colors to make a gradual transition from one color to another. Color choice has a huge impact on the finished design. For example, mix metallic thread over a darker rayon color to give depth beneath the shimmer of the metallic thread.
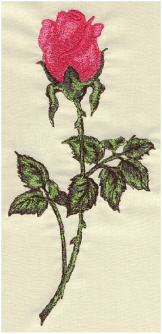
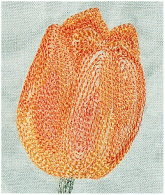
Use concentric outlines to follow the contours of shapes. Shade the same color by changing the spacing of the contours. Blend colors and make transitions by alternating thread colors on the contours.
Horizontal ZigZag ![]() is very effective for adding shadows under objects. Also use Free Motion
is very effective for adding shadows under objects. Also use Free Motion ![]() to fill in shadow areas directly on an object.
to fill in shadow areas directly on an object.
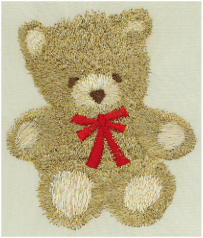
Use Free Motion ![]() to easily create natural texture effects such as fur, feathers, grass and hair.
to easily create natural texture effects such as fur, feathers, grass and hair.
Give a smooth texture to shiny objects by drawing contours around the bright spot.
The choice of thread can further enhance the texture effect you wish to create. For example, use metallic and holoshimmer threads for shiny objects, or use matte finished threads such as heavy cottons or wool for fur. Alternatively, used multicolor twisted threads for fur.
When you are working on a scene which has elements that are near and far, you can use the stitch size and color to help add depth to the scene.
Use large stitches in the foreground. Also, use thread shades that are brighter or more intense. Brighter colors help objects to jump to the front of a scene.
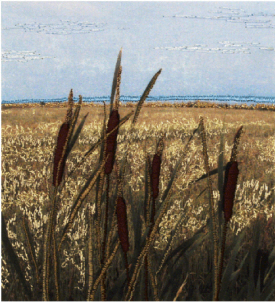
Use smaller stitches in the background and thread shades that are more muted than the foreground colors. Muted colors give a feel of hazy distance, especially in landscapes.
For example, if you have a scene with trees that go into the distance, use Free Motion ![]() for the trees that are far away. Then draw the nearer tree trunks and branches with ZigZag, to give a sense of scale with the width of the ZigZag.
for the trees that are far away. Then draw the nearer tree trunks and branches with ZigZag, to give a sense of scale with the width of the ZigZag.
Also, closely follow the shape of objects in the foreground, to give them more detail and focus. Use less precision in the background, to give the idea of losing details as they blur in the distance.
Create horizon stitches by using Horizontal ZigZag ![]() in a side-to-side motion.
in a side-to-side motion.
Zoom in and draw with small Free Motion ![]() stitches to highlight fine details in the design.
stitches to highlight fine details in the design.
Use the Calligraphy  function to write text or draw as if using an italic calligraphy pen. Any instruction book on using a pen for calligraphy can be followed for creating calligraphy in mySewnet™ Sketch. Simply draw with stitches instead of ink. Also, see the pictures in Documents\mySewnet\Samples\ Sketch\PicsCalligraphy that show how to draw a calligraphy alphabet.
For a brush stroke effect, use a flat or vertical Calligraphy Angle and change the ZigZag Width while drawing Calligraphy.
Use Free Motion ![]() , Running Stitch
, Running Stitch ![]() or Triple Stitch
or Triple Stitch  to write text directly as stitches, creating truly natural handwriting in stitches. Also do this to add your signature to any embroidery you have created.