Create a Fish Word Sculpt Design
-
In the Create tab, click Word Sculpt
 .
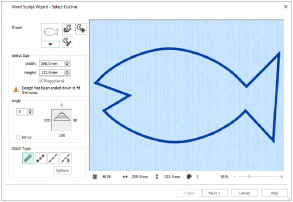
.  The Select Outline page of the Word Sculpt Wizard appears.
A large hoop is best when creating a word sculpture. -
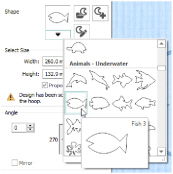
Click the drop-down arrow for the Shape list. There are over 300 shapes to select from.
You can also load, create or edit a shape. -
In the Shape drop-down list scroll down to the Animals - Underwater category, and select the shape Fish 3.
The size of the design is set by the currently selected hoop. There is no need to change the settings in Select Size for this design. -
Ensure that Angle is set to 0, and that Mirror is not selected.
Use Angle and Mirror to adjust the position of the outline. -
In Stitch Type ensure that Satin Line
 is selected.
For a different effect, you can select Motif Line , and click Options to choose a different motif and its settings.
 -
Click Next and the Select Words page of the wizard will appear.
-
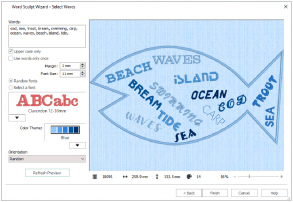
In the Words text box, enter the words or phrases to use in your design, separated by a comma.
-
Set Margin to 1mm to place the words close to each other.
-
Reduce Font Size to 11mm to enable more words to fit into the fish outline.
-
Ensure that Random fonts is selected.
-
In Color Theme, select Blue from the drop-down menu. The outline and words now use various shades of blue.
-
In Orientation ensure that Random is selected.
-
Click Refresh Preview to use your updated settings.
-
Click Refresh Preview again. The arrangement of the words and the number of words used changes.
-
Change the settings and use Refresh Preview until you are happy with the results.
-
Click Finish to place the design in the work area. Save
 this original version, if desired.
 -
At the bottom of the FilmStrip, click Reveal Groups
 , then click the yellow handle on one of the lettering Blocks. You can see the settings for the Block.
 -
Click and drag the handles on the block to mould it to the desired shape.
-
To change the font in a lettering Block, right-click the Block and select Properties in the Context menu.
If you want to mould a lettering Block to a larger size, a different font may look better. Check the size range before changing.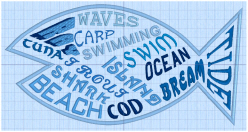
-
To add a word to the design, Copy
 then Paste
  one of the words, and move it to the desired position on the work area and in the FilmStrip.
 -
Right-click the new word, and in the Letter Properties dialog box change the text and font. Click OK.
-
In the Color Select area on the Design Panel, click the thread color and set it to match the theme.
-
Mould the new word to shape.
-
Add words to your design and mold them to shape, then Save
 your finished design.
Not all of your words may be used. Use a word twice in your list if you want it to be frequent in the design.
You may find it easier to create the list in a text editor and paste it in.
If desired, deselect Upper case only to use upper and lower case letters, and select Use words once only if you do not want words repeated.
Random fonts will use a variety of fonts recommended for the selected Font Size. For example, both Antonia 10-20mm and Arial 08-14mm may be used when the Font Size is set to 11mm.
For a different effect, choose Horizontal and Vertical or one of the other options.
The design is loaded as a Group, and each word is a lettering Block with Curve line types at Top and Bottom, and Constraint set to Free. You can mould each Block to almost any shape you wish.
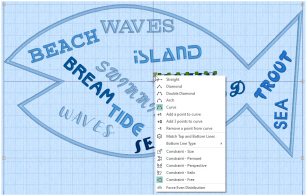
For more information on adjusting lettering Blocks, see Creating Lettering in the mySewnet™ Embroidery Reference Guide or Help.
You can select different lettering Blocks in the FilmStrip. Use the Tab key, or Shift + Tab to move between the designs in the Group.