Use Export as Machine Stitch ![]() to save the drawing or selected area as an .spx machine stitch for certain sewing machines, or send it to the sewing machine. Save and name the design file. mySewnet™ Draw & Paint displays the Export as Machine Stitch dialog.
to save the drawing or selected area as an .spx machine stitch for certain sewing machines, or send it to the sewing machine. Save and name the design file. mySewnet™ Draw & Paint displays the Export as Machine Stitch dialog.
If the first and last stitches are not aligned, a message appears to give you the option to add an alignment stitch.
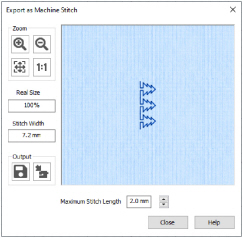
Maximum Stitch Length
Define a maximum length for the stitch.
Output
Save or send the design as a machine stitch.
Export as Machine Stitch
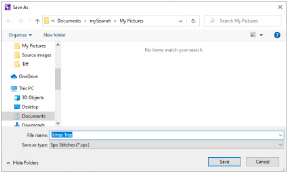
Click Export As Machine Stitch  to export the stitch, then click Save. The Save As dialog for machine stitches is displayed so you can name your stitch.
Files can be saved in Spx (.spx) format.
Use Send to Machine ![]() to send a saved Spx stitch file to your connected machine.
to send a saved Spx stitch file to your connected machine.
Alternatively, copy the Spx stitch file to a USB Embroidery Stick.
Zoom
Use the Zoom functions to change the view of the stitch.
Use Zoom In
to magnify the view. Move the pointer over the picture and the pointer changes to the zoom in pointer

. Then either click a point you want to zoom in towards, or click and drag a rectangle around the area you want to zoom in to and release the mouse button to zoom. When zoomed in, use the scroll bars to move around.
Use Zoom Out
to shrink the view. Move the pointer over the picture and the pointer changes to the zoom out pointer

. Then click a point you want to zoom out from.
Click Zoom To Fit
to fit the picture to the preview area.
Click Real Size
to view the picture at its real size in pixels. This means that one pixel of the picture uses one pixel of the screen.
Shortcuts
-
Draw Tab, Motif:

-
Keys: Alt, D, H, X