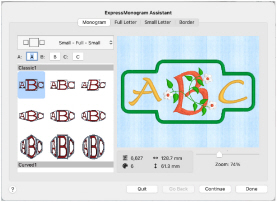
Use the ExpressMonogram Assistant to create a monogram from a set of initials. The Monogram page of the ExpressMonogram Assistant appears.
Select a font style, thread color, shape and size. Surround the monogram with a border. Alternatively, create a monogram with no border, then add a Frame or Flourish in the Frame window, or a motif underline in the Border window.
Create a Monogram
-
In the Create window

of the Control Panel

click ExpressMonogram Assistant
 . Alternatively, choose Assistants > ExpressMonogram Assistant.
 -
Choose a monogram type from the pop-up menu on the left. Select how many letters to use, and whether they are Full or Small.
Note: The size of a Small letter is proportional to the Full monogram letter. You can use different fonts and colors for Small letters. -
Enter the letters for your monogram in the boxes A, B and C.
If the box for the letter is blank, a question mark is inserted instead.
Note: For traditional monograms, letters are used in the order of given name, family name, middle name. -
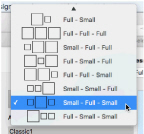
Select a monogram Envelope category and type from the scrolling window.
All the envelopes available use the number of Full and Small letters that you have chosen. Choose an Envelope that uses the desired size ratio for your Full and Small letters.
Note: You can return to this page later if you want to adjust the choices you made. -
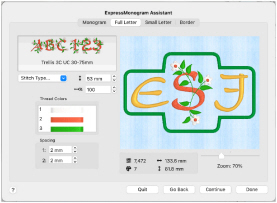
Click Continue. The Full Letter page appears.
-
Click the displayed font to select a font from the scrolling window. For example select the font Curly UC 15-30mm in the Monogram Category in the displayed list of fonts.
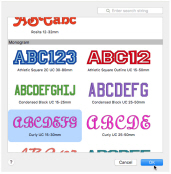
Note: The Monogram fonts are recommended for use with the Classic envelopes that use SFS (small, full, small characters), as they are designed with mainly even width characters. -
Select a Height

for the letter(s).
Note: For best results, choose a size within the recommended range shown in the font name. The size is initially set to the middle of this range. -
Change Percent Width

to make the letters wider or narrower.
The Width setting is a proportion of the overall size. -
Use Spacing 1 and Spacing 2 to adjust the amount of space in millimeters between the letters. Use negative values to interlock letters, if desired.
You may need to adjust the spacing after selecting the font for the small letters. -
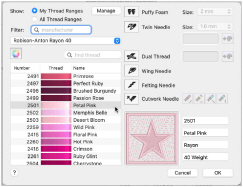
Click on a thread color to display the Color Selection dialog. Here you can select another shade by clicking on it, or by entering the thread number in the Find Thread text box. Click OK to close.
In the Stitch Type pop-up menu you can change the properties for the stitching in the font. The pop-up menu may be dimmed (unavailable), depending on which stitch types are present in the font. -
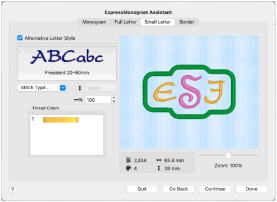
Click Continue. If you selected a monogram that included small letters, as well as large ones, the Small Letter page appears. Otherwise the Border page will appear.
-
In this page, adjust the style and color of the small letters in the monogram.
-
Click Continue. The Border page appears.
-
Increase Margin to give more room around the letters (the amount of space around letters is also affected by the Spacing settings in the Full Letter page).
-
Choose whether to use rounded corners and individual letter borders for the monogram letters.
-
Select a Stitch Type, and use Options to set its properties.
-
Click Done to close the assistant and place the embroidery in the work area.
-
Use Save to save the monogram as a multipart embroidery in .vp4 format.
-
To adjust the monogram further, Insert or Open the saved monogram, then Control–click and choose Properties. The monogram is opened in the ExpressMonogram Assistant.
The Monogram page opens.
Adjust the style and size of the large letters in the monogram, and the space between all letters in this page.
Check the size in the design information as you progress, to be sure that the embroidery will fit in the desired location.
Note: Spacing will affect whether individual borders are created around the letters in the monogram.
Note: Deselect ’Alternative Letter Style’ to use the same font, color and thread as for the Full letters.
Note: The individual borders will only show if there is enough space between the letters.
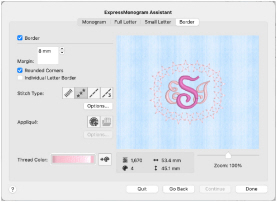
Note: You can also change the border thread color.