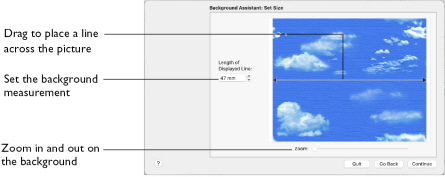
Use Set Size to enter a real measurement of the fabric so that it is displayed at real size when it is used as the background. The fabric is shown in the preview.

Measure the Picture
-
Drag the arrows at either end of the gray line to place a line across the picture.
This should match a measurement you have made across the same area of the real fabric. -
Click the arrows for height and width to change the line measurement. Alternatively, enter a size in the number box.
-
Check that the line and the length matches the measurement you made of the real garment or fabric. If desired, drag the arrows to place a new line and re-enter the line length.
-
When the line is measured correctly, click Next.
Note: The length can be from 10mm to 1000mm.
Zoom
Use the Zoom bar to change the view of the embroidery. Zoom in to magnify the view. Zoom out to shrink the view.
Note: When zoomed in, scroll to move around.
Continue
Go to the Set Background Name page.
Go Back
Return to the Rotate and Crop Picture page.