Ryan - Using the PhotoStitch Wizard
-
Click the Create tab.
-
Click the drop-down arrow beneath the PhotoStitch Wizard icon

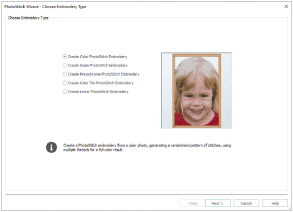
, then click PhotoStitch into Hoop. The Choose Embroidery Type page of the PhotoStitch Wizard appears.
-
Select Create Color PhotoStitch Embroidery and click Next. The Choose Picture page appears.
-
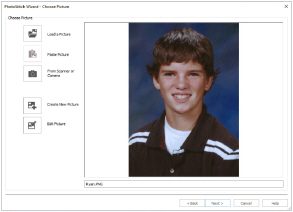
Click Load a Picture

, to select an existing picture file. The Picture Viewer appears.
-
Browse to \mySewnet\Samples\Embroidery\Photos.
-
Scroll to Ryan.PNG.
-
Click the 'Ryan.png' thumbnail, then click OK. The photo is loaded onto the Choose Picture page, with its name shown below the preview area.
-
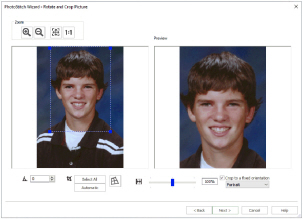
Click Next and the Rotate and Crop Picture page will appear.
-
Select "Crop to a fixed orientation", and then select Portrait.
-
Move the handles on the corner of the crop box on the left so that the crop frame encloses Ryan’s head and chin, showing a little of his shoulders.
-
Move the pointer over the crop box so that the arrow pointer changes to a four-arrow pointer. Drag the box so that it is centered over the face.
-
Take care to leave enough space at the top of the picture for a balanced portrait. A slightly larger selection would be needed for a square PhotoStitch, compared with this rectangular one.
-
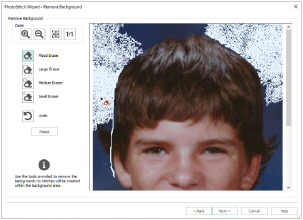
Click Next. The Remove Background page will appear.
-
Click Flood Erase

.
-
Click the blue background to the top right of Ryan’s head. The blue background is replaced by a check pattern, to show where there will be no stitches. Small differently colored areas are left behind.
-
Continue using Flood Erase

to roughly remove the dark blue background on the right.
-
Click the dark area to the left, close to Ryan’s head.
-
The line of the hair above the ear will affect the appearance of the embroidery. Click Undo.
-
Click Zoom In

. The pointer changes to the zoom in pointer.
-
Click and drag to draw a rectangle around the area to the left of Ryan’s head, then release the mouse button.
-
Select the Small Eraser

and draw a smooth line to the left of Ryan’s head.
-
Remove the curl of hair by the ear, and leave a small amount of the background color near the hair above.
-
Click Zoom to Fit

to see the full picture again.
-
Use Flood Erase

to remove the hair by the ear.
-
Use Zoom In

to magnify the area to the right of Ryan’s head.
-
Use the Small Eraser

to draw a line to remove the curl by the right ear.
-
Remove the area with Flood Erase

.
-
Click Zoom to Fit

to view.
-
Use Zoom In

to magnify the areas of the face where the skin is adjacent to the blue background.
-
Then use the Small

or Medium

Eraser to remove the blue edge.
-
Click the Large Eraser

, and try to clean all remaining specks from the background.
-
Use Zoom In

and Zoom to Fit

when tidying up the outline and background.
-
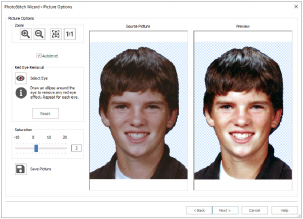
Click Next. The Picture Options page will appear.
-
Leave Autolevel on. There is no red eye to correct in this picture.
-
Set Saturation to 2, to enhance the tones of the lips and cheeks.
Increasing saturation enhances the intensity of colors, for instance to make pale skin tones appear ’warmer’. If desired, use Save Picture
to save a copy of your edited picture.
-
Click Next and the Design Size page will appear.
-
Set Height to 119mm.
-
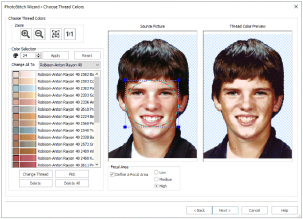
Click Next. The Choose Thread Colors page will appear.
-
Note the number in the Color Selection box. This gives the number of colors in the picture. In this example it is 26.
-
To emphasize the eyes and mouth in the selection of colors, click Define a Focal Area.
-
Ensure that High is selected in Focal Area. (The default is Low.)
-
Move the handles on the corner of the crop box, and the crop box itself, so that the circle encloses the eyes and mouth.
-
Make a note of the new number. (In this example it is 24.)
-
Scroll down the list of threads. If there is more than one deep blue in the thread color list on the left, select and delete one of the shades of blue and check the result.
-
Click Next. The PhotoStitch Embroidery Options page will appear.
-
Click Finish to close the wizard.
If you position the arrow pointer over a thumbnail without clicking, the name of the picture will be shown.
If necessary at any time while cropping, click Automatic and start again.
It is recommended to use a graphics tablet and pen, if available, for the Remove Background functions.
The pointer changes to the Flood Erase pointer

while positioned over the picture.
Flood Erase removes a particular color, and very similar colors.
If you make a mistake, click Undo to reverse your last action. If necessary, use Reset to start again. Undo reverses the last action, while Reset returns to the original version of the picture.
Lift the mouse button or graphics tablet pen frequently. Then if you make a mistake, and need to Undo, you will not lose much work.
It does not matter if you go a little into the skin tones as a slightly rough outline will not affect the final embroidery.
The Medium Eraser is better for cleaning areas close to Ryan’s head.
It is best to remove all specks of background as they may lead to ’stray stitches’.

Autolevel adjusts brightness and contrast automatically. This improves results for most pictures.
If you use a photo that you edited the number will vary, depending on exactly how you cropped and edited the photo.
Each time you run the PhotoStitch Wizard on the same picture, the results may differ. A slight change in cropping a picture, or in removing the background, will affect the balance of colors, and the type and number of threads used.
To reposition the crop box, move the arrow pointer so that it changes to a four-arrow pointer, then move the box. The number of colors changes as you move and resize the Focal Area crop box.
You can often slightly reduce the number of colors with little visible effect, but a further reduction will badly affect the color quality.
The computer will recalculate how to stitch the picture, based on the reduced thread list, and the number of stitches will be reduced.
The small amount of deep blue in the picture mainly comes from remaining traces of the background color. The number of shades can be safely reduced.
Similarly, you can change a thread color. The computer will recalculate the stitches, based on the threads now in use.
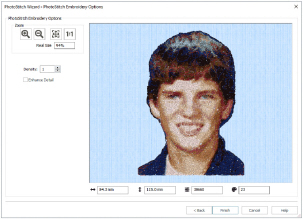
Use Enhance Detail to bring out detail in the picture. Enhance Detail does not change the colors used, it affects the way that those colors are used. A higher number for Density will produce looser stitching and fewer stitches than the standard setting of 1.
Leave Enhance Detail unchecked and Density at 1 for this PhotoStitch.
The PhotoStitch embroidery appears in the work area.