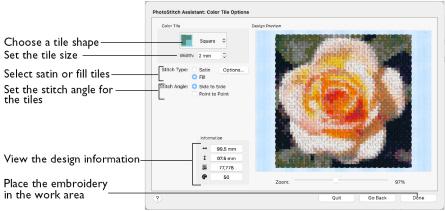
Use the Color Tile Options page to choose tile shape for the embroidery, select the stitch type, and the tile size and angle. View and check the final design in 3D before closing the PhotoStitch Assistant.
The Color Tile Options page of the PhotoStitch Assistant only appears when you create a Color Tile embroidery.
Color Tile
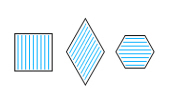
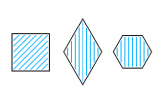
The available tile shapes are:
The default tile shape is Diamond.
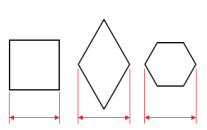
The tile size is based on the width of the tile at its widest point.
-
Choose a tile shape from the pop-up menu.
Width
Select the width (size) of the tiles.
-
Click the arrows to set Width from 2 to 5mm, or enter a value in the number box.
Stitch Type
The stitch options selected here are retained until changed.
Satin
Use Satin stitch for the tiles.
-
Select Satin, then click the Options button to set the Density options.
Satin Density
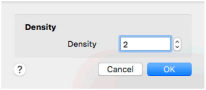
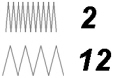
Set the stitch Density for the Satin stitch tiles. The lower the number, the closer together the stitches and the more stitches are produced.
-
Click the arrows to set Density from 2 to 12, or enter a value in the number box.
Fill
Use Fill for the tiles.
-
Select Fill, then click the Options button to set the Density options.
Fill Density

Set the stitch Density for the Fill tiles. The lower the number, the closer together the stitches and the more stitches are produced.

-
Click the arrows to set Density from 2 to 12, or enter a value in the number box.
Stitch Angle
Set the stitch angle for the tiles. Side to Side uses stitches that are parallel to the sides of the shape, and Point to Point uses stitches that run from corner to corner of the shape.
|
|
|
Side to Side |
Point to Point |
-
Select the Stitch Angle for the tiles.
Zoom
Use the Zoom bar to change the view of the picture. Zoom in (drag the slider to the right) to magnify the view. Zoom out (drag the slider to the left) to shrink the view.
When zoomed in, use the scroll bars or swipe to move around.
Design Information
The design information boxes show the number of stitches in the embroidery, the height and width and the total number of color changes.
Go Back
If desired, use the Go Back button to go back through the PhotoStitch Assistant and modify settings before previewing the design again.
Done
Accept the final design and close the PhotoStitch Assistant.