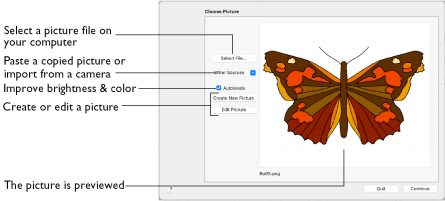
Use the Choose Picture page to select the picture you wish to use as a background.
After selecting a picture, the preview box shows the selected picture with its name underneath.
Select File
-
Click Select File to open a picture from one of the Samples subfolders, such as: mySewnet/Samples/Embroidery/Pics. Alternatively, browse to a folder elsewhere on your computer.
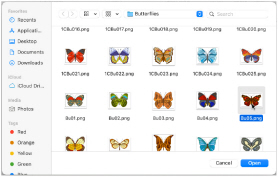
Note: Click Show as Icons
to view thumbnails of the pictures.
The following file formats may be loaded: Windows or OS2 Bitmap (.bmp), JPEG-JFIF Compliant (.jpg, .jif, .jpeg), PatternCAD (.4dq), Portable Network Graphics (.png), Tagged Image File Format uncompressed (.tiff., tif), Windows Meta File (.wmf), Windows Enhanced Meta File (.emf) and Windows Icon (.ico), High Efficiency Image Format (.heic).
Select a Picture
-
Click Select File. The Open dialog appears.
-
Browse to the desired folder, for example mySewnet/Samples/Embroidery/Pics.
-
Click on a picture.
-
Click Open to open the picture onto the Choose Picture page, and to close the dialog.
Click the Cancel to exit without selecting a picture.
Other Sources
Paste
-
Paste an image from the Clipboard.
Services
Use Services to import a picture.
-
Camera: Import a picture from an integrated MacBook® camera.
-
Capture Full Screen: make a screenshot of the whole screen.
-
Capture Selection from Screen: make a screenshot of part of the screen.
-
Import Image: import a picture from a camera or scanner connected to the computer.
Autolevels
Use Autolevels to improve the brightness and contrast in most photos. It can also be used to bring out the color in underexposed pictures.
By default Autolevels is enabled.
Note: Occasionally Autolevels does not improve the appearance of a picture, and may need to be switched off.
Create New Picture and Edit Picture
Create a new picture or edit an existing picture in mySewnet™ Draw & Paint.
Continue
Go to the Rotate and Crop Picture page.