Use Ungroup ![]() to split the selected group into the objects which make it up.
to split the selected group into the objects which make it up.
Note: Ungroup can only be used when a group is selected.
Ungroup some objects
-
Select a Grouped object in the FilmStrip or on the canvas, then click Group
 .
. -
Select a Grouped object, then choose Draw > Group > Ungroup.
-
Press ⇧⌘G
Ungroup Grouped Objects
-
Open the Insert Tab
 of the Design Panel
  .
. -
Click to select Design Gallery
 .
.
-
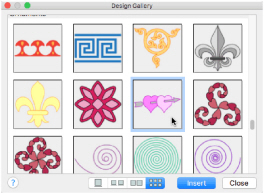
In the Design Gallery dialog, load a design onto the canvas and click Close.
The Gallery design is displayed as a group in the drawing area. Note that Group is now active in the toolbar. -
Move the Gallery design around the screen. It moves as one unit.
-
In the toolbar click Ungroup

. The group is now a block.
-
Move the Gallery design. As it is a block it moves in one piece.
-
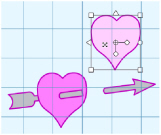
Click outside the Gallery design. A box is no longer displayed around the design.
-
Click inside the Gallery design again. This time only a part of the design is selected. You can move it separately.
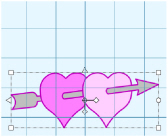
A Gallery design is a single Group
When Ungrouped it is a block. You can move a part separately
Note: While the block is still selected you can reverse the effects of Ungroup by using either Group or Undo.
Use Ungroup followed by Delete, then Group again to remove an unwanted section from a drawing.
If a piece of a drawing is accidentally left behind when you move it, use Undo and Group before trying again.
Ungroup a Group of Objects
-
Select a Group, then click Ungroup
 .
. -
Select a Group, then choose Draw > Group > Ungroup.
-
Press ⇧⌘G