When you save an embroidery file for the first time, mySewnet™ Stitch Editor displays the Save dialog so you can name your multipart .vp4 embroidery file.

Note: Depending on previous choices when saving files, the compact or expanded save dialog is shown.
The embroidery is saved as a multipart embroidery in .vp4 format. This keeps the separate sections, and preserves thread color information and notes.
Note: To use other embroidery formats, choose Export. See Export.
To use Save
-
Click Actions

on the toolbar and choose Save.
-
Choose File > Save.
-
Press ⌘S
Save an Embroidery
-
Create an embroidery.
-
Click Actions
 on the toolbar and choose Save to save the design in the Save dialog. Alternatively, choose File > Save (or press ⌘S).
 -
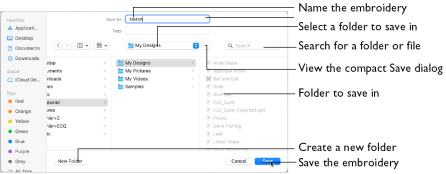
In the Save As text box, enter a name for your embroidery.
-
Browse to the desired folder, or create a new folder.
-
Click the Save button to save the embroidery.