With Box Select ![]() , drag to select stitches in a rectangular area.
, drag to select stitches in a rectangular area.
Note: Use Add to Selection to add an area to your selection, or Remove From Selection to remove an area from your selection.
Select Box Select
-
In the toolbar, click Box Select
 . Drag to select the desired stitches.
 -
Choose Edit > Box Select. Drag to select the desired stitches.
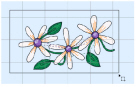
Select an Area with Box Select
-
If desired, use the Draw Range sliders, Filters and color worksheet to hide objects so that it is easier to see the required stitches.
-
In the toolbar, click the Box Select button

. The pointer changes to the box select pointer

.
-
Drag to draw a rectangle around the stitches you want to select.
-
Lift the pen or release the mouse button when the required stitches are enclosed. They become the current selection, as indicated by a rectangle with blue or white handles.
-
If you want to make a new selection, click outside the current selection to deselect it. Then draw a new box around the required stitches.
The block can be moved, scaled and/or resized, mirrored horizontally and vertically and rotated to any degree. The block can be copied or cut to the clipboard and then pasted to the same or another embroidery. The block can also be deleted.
Note: Box Select is also activated automatically when a block is pasted into an embroidery.
Note: Use Add to Selection to add an area to your selection, or Remove From Selection to remove an area from your selection.