Use Insert to select cross stitch design (.krz) files to add to the current design. mySewnet™ Cross Stitcher displays the Insert dialog so you can load a saved cross stitch design into an existing window, or start a completely new project.
To insert a cross stitch design
-
Click Actions

on the toolbar and choose Insert.
-
Choose File > Insert.
-
Press ⌘I
Insert a Cross Stitch Design
-
Click Actions

on the toolbar and choose Insert. Alternatively, choose File > Insert or ⌘I.
-
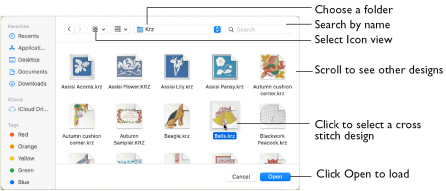
Browse to the desired folder in the Open dialog.
-
Switch to Icon View to see thumbnail pictures of the designs in the folder.
-
Scroll to view the other designs in the folder.
-
Click a cross stitch design to highlight it.
-
Click the Open button to load the cross stitch design.
The cross stitch design is placed in the middle of the design area and automatically selected so that it can be moved, mirrored, rotated, copied or cut.
Note: You can use Insert to transfer design elements between cross stitch design files. Simply delete all the objects from a design except the desired design element (for instance, in a floral design delete everything except one flower that you want to use somewhere else). Save the isolated design element as a new cross stitch design file (.krz). Open the design where you want to insert the isolated design element, then browse and insert it with Insert. If you do this several times then you will gradually build up your own library of design elements.